The Workshop on the Go card kits are fabulous when you need to whip up a card in a pinch. The instructional brochure lists all of the materials needed and includes the cutting guide and insturctions to complete the cards. I had about an hour of "idle" time a few days ago and decided to make one of each of the cards in the Chantilly kit. I completed all three cards with time to spare.
These cards were fast, simple, and easy. I love that I could start with the designs from the workshop kit and tweak them slightly to suit my taste. I only changed a few minor things, ommitting some of the wooden badge buttons, stamping my banners on scrap cardstock and hand cutting them, and inking the edges of everything.
Stamping the banners on scrap cardstock and cutting them out allowed me to ink the edges and add dimension to the card. The wooden badge button on the Birthday Wishes card looked a little bare to me, so I stamped a flower on it before attaching it to the card.
The banners on the Happy Birthday card are all stamped, hand cut, inked, and adhered as well. I omitted the badge buttons from this card and added a bow of baker's twine to the ribbon.
I did a little extra stamping on the Hope Your Day is Happy card. The workshop brochure instructs you to stamp the sentiment background in desert sand and add the sentiment in lagoon. I decided to add a little color to the sentiment by stamping the background in sweet leaf on a cardstock scrap, cutting out the rectangular piece (which I stamped with the lagoon sentiment), and adhering it over the desert sand rectangle. You can see the contents of the workshop kit on page 22 of the Spring/Summer Idea Book. If Chantilly is not your paper of choice, the card patterns are also included in Make It from Your Heart Volume 1.
Happy Scrapping!
Wednesday, April 10, 2013
Thursday, April 4, 2013
Buzz and Bumble Card
Ever have one of those moments when you know exactly what you want to create and you actually have the time to sit down and work on it? Last week, while I was perusing Pinterest, I came across a card by Danielle Kennedy that made me immediately think of the Buzz and Bumble Papers. Her work is stunning! With the exception of the little bees, the card actually went together fairly quickly.
The Buzz and Bumble assortment would have been perfect for this card, but I didn't have it at the time. To recreate the little bee silhouettes, I sketched the shape I wanted onto a scrap piece of cardstock and cut it out. They are less than half an inch in size. I glued small strips of the patterned papers to a strip of cocoa cardstock, adhered my pattern with temporary adhesive, and cut around the pattern.
The wings of the bees are slightly bent upward to make them appear as if they are buzzing around the card. The sentiment is from the Honeycomb stampset and the flowers were cut from an image on the Fabulous You stamp set. I cut the beehive on the cricut from the Walk in My Garden cartridge and popped it up with 3-D foam tape.
I've been working on a few other projects that I hope to have photographed and posted soon. Thanks for stopping by!
Tuesday, February 26, 2013
Finally!
I haven't been feeling very creative lately. With three volunteer positions that feel more like an (unpaid) full time job, I rarely have the energy to to pull out my supplies. Last weekend, I decided to set aside my chore to do list, took a hiatus from my volunteer work and got crafty with two of my very creative friends.
On Friday, my friend, Donna, invited me over to craft. I took along my Later Sk8r paper pack and the For Always Card WOTG kit. Donna is so creative and I always come home inspired and ready to make more (visit her blog here). She made a beautiful card using the March stamp of the month, Floral Happiness and let me make one while I was there. The card is stunning in Sunset. She also made one using Gypsy.
I shared a card with her that I put together at the Boston Croppers crop last month using the Chantilly papers. The card was a big hit at the crop. The lighting in the picture doesn't do it justice.
I managed to put together one card fromthe For Always Card WOTG. The ribbon included in the kit seemed too thin for the design, so I substituted Slate Satin Polka-Dot Ribbon instead. I planned to change up the colors too, but decided to stick with the kit suggestion for now. I like the exclusive stamp set that comes with the kit. This card can be used for any Woo Hoo moment in life.
When we received our new idea book papers, Donna showed me a card she made using the Later Sk8r paper pack and the Born to Ride stamp set. I had that card in mind when I packed my supplies for the day. I changed mine up a little bit, but the design and idea is hers. I love how she stamped the inside too and kept mine the same.
All of the creating didn't end on Friday when I had to head home. On Sunday, my friend, Lisa, and I finally found a chance to Skype-scrap. We haven't had a chance to scrap together since she moved across the country last September. We scrapped together for over 3.5 hours and had so much fun! Her new scrap room is beautiful! I shared my Chantilly card with her and then made her design a card on the spot. Nothing like a little pressure to turn out an amazing design! We used the Later Sk8r papers and the Wheel of Life stamp set. We cut the gears using the Art Philosophy Cricut cartridge, sanded a little to distress, inked the edges (I ink everything), and added a few embellishments.
I added Green & Blue Epoxy Bubbles and gears from the Later Sk8r Assortment on my card. I originally planned to use a chipboard spinner, but it was too heavy for the card. I stamped and cut out my spinner instead. Here's a little detail shot:
I'm going to tuck this card into a little care package for my daughter. Check out Lisa's card here and get a little peek at her amazing craft space too).
Thanks for sticking with me through this long post. I hope it was worth the wait!
Thursday, January 3, 2013
Happy New Year
Wait... what??? Where did the time go? Shortly after my last post, I dropped my daughter off at college, caved in to a friend's pleas to be the PTSA Treasurer, became the finance secretary at church, tried not to fall into a depressive abyss when a dear friend moved across the country, and caught that awful cold that put me out of commission for two weeks (and then a thrid week to recoup). I managed to create the layouts for my monthly class and put together a couple cute projects. The pictures aren't loaded onto my computer yer, but I promise to post them very soon.
Friday, August 3, 2012
The Fun Has Arrived

New papers, and stamp sets, and embellishments... oh my! The Autumn/Winter 2012 Idea Book is a paper crafters dream! You can view the idea book online here. If you'd like your very own copy (and I know you will), send me a message and I'll get one to you
Later this month I will have a display set up at the county fair. When a patron donates to Operation Smile, they can make this cute 3 x 3 card.
I used the Dakota paper pack, Artiste Cricut Cartridge, and the coordinating Kudos stamp set included in the Artiste bundle. To add a bit of extra flair, I embossed the Pacifica cardstock with my Cuttlebug.
I cut the band, circles, and the star using Artiste.
I will have a few more projects to post in the next few days. Thanks for stopping by.
Saturday, June 23, 2012
Graduation Day
We've been busy around here with final exams and end of the school year activities. Tomorrow we will be celebrating Kayleigh's graduation from high school, and, of course, I waited until the last minute to make her card. I sat down in my scrap room yesterday without a clear picture in my mind of what I wanted to create, so I turned to my favorite blogs for inspiration. As soon as I saw this card (thank you Connie!), I knew exactly what I would make. When I finished the card, I realized that it fits this week's Heart 2 Heart challenge too. The challenge is to use ribbon on your project.
Kayleigh loves plaid (she chose navy blue plaid bedding for her dorm room), so I knew I would use the Victory Papers for her card. She also loved the camo print in the pack, which I used it to make the medallion.
Since the card base is dark, I finished off the inside with a piece of the ledger paper. I can hardly wait to see her open it. Being an artist, I know she will appreciate every detail.
Kayleigh loves plaid (she chose navy blue plaid bedding for her dorm room), so I knew I would use the Victory Papers for her card. She also loved the camo print in the pack, which I used it to make the medallion.
To give the card a touch of femininity, I replaced the buttons with pearls and used an outdoor denim organdy ribbon. The color ready cork numbers add another layer of texture.
Since the card base is dark, I finished off the inside with a piece of the ledger paper. I can hardly wait to see her open it. Being an artist, I know she will appreciate every detail.
Friday, June 8, 2012
Footloose Beach Layout
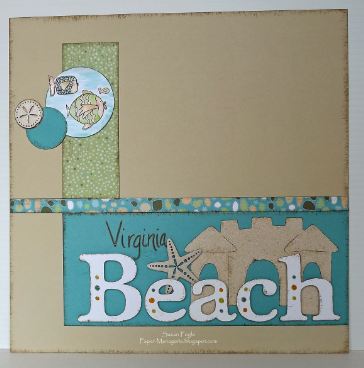
I worked on this layout on and off for a couple weeks in between all of the end of the school year activities. My oldest daughter, just 10 months old in the layout, is graduating from high school this year. They grow up so fast. The left page is missing the large photo (a cropped 8x10) because somehow I lost the original photo that I was going to have enlarged. We are creating a simple version (no seaside wooden shapes) of this layout in the June Asbury Scrapbooking class on the 16th. We chose to make the layout featured on page 40 of the spring/summer idea book using stamped embellishments in place of the Complements Dimensional Elements. I incorporated elements featured in the artwork on pages 41 and 42 as well. While the Footloose papers are perfect for water and beach themed photos, they are neutral enough to use for other occasions too.
Subscribe to:
Posts (Atom)